

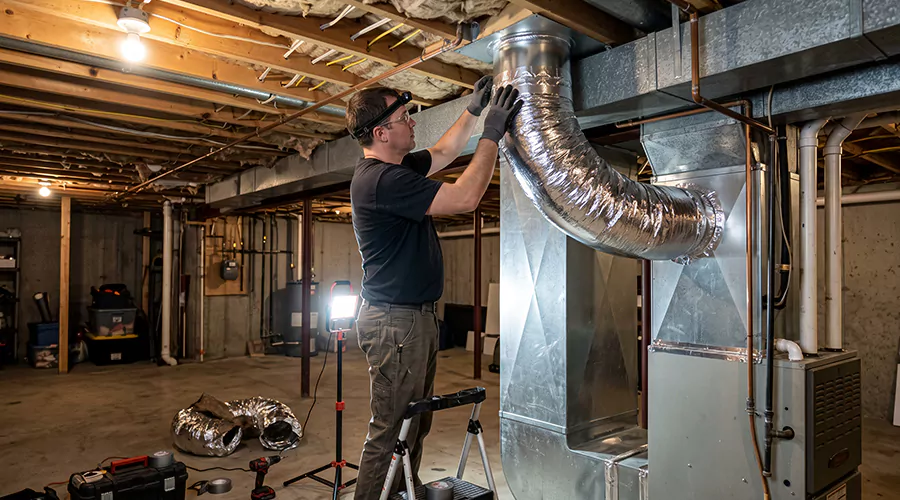
Replacing a return air duct involves identifying the damaged passage, calculating the required return airflow, removing unsuitable ductwork, and installing a properly sized, airtight connection between the return grille and the HVAC equipment. The new duct must provide a low-resistance path for indoor air to reach the blower. After installation, the system should be checked for leakage, excessive pressure differences, and normal airflow.
Return air ducts are a major part of a forced-air heating and cooling system. While supply ducts distribute conditioned air into rooms, return ducts carry indoor air back toward the furnace or air handler. Both sides must work together for the equipment to circulate the required amount of air.
A damaged return duct can cause problems that are not always obvious from the room registers. Loose joints may draw air from attics or crawlspaces, while an undersized return can increase resistance to the blower. Some older homes also use poorly sealed wall or floor cavities as return pathways, which can contribute to unwanted air leakage.
Replacing a return duct is therefore different from simply attaching a new length of tubing. The contractor must consider airflow capacity, return grille size, filter location, and the pressures created throughout the home. Correct sizing and sealing help the replacement work properly without creating new comfort or safety problems.
What Is a Return Air Duct?
A return air duct carries room air from a return grille back to the heating or cooling equipment. It connects to the return side of the furnace or air handler, where the blower moves air through the system. A filter typically removes particles somewhere along this return path before air reaches sensitive equipment components.
Some homes have one large central return grille. Others use several returns placed in different rooms or hallways. The arrangement depends on the heating and cooling design, the floor plan, and the airflow requirements.
Return ducts are different from supply ducts because they operate on the intake side of the air distribution system. Openings in a return duct can pull air from unwanted locations rather than simply release conditioned air. This makes proper sealing particularly important.
A return air duct must also be distinguished from a furnace combustion flue. The flue carries combustion exhaust outdoors and is subject to separate safety requirements. It must never be treated as an ordinary room-air return.
When Should a Return Air Duct Be Replaced?
Our air duct repair service becomes appropriate when the passage is structurally damaged or cannot meet the required airflow needs through a reasonable repair. A severely crushed flexible return or badly corroded metal section may require new material. A duct that was incorrectly sized can also need redesign.
However, many return duct problems can be repaired without replacing the entire passage. A loose joint may only need proper mechanical fastening and sealing. A sound duct with a localized leak may remain usable after an appropriate repair.
The important distinction is whether the material and design are suitable for continued service. Replacement should correct a documented problem rather than be recommended only because the system is old.
Common Warning Signs
Several symptoms may suggest that the return air system needs attention. These signs should prompt inspection rather than immediate replacement because filters, equipment, and supply ducts can produce similar problems.
- A return duct has visible tears, collapse, or extensive corrosion.
- Connections are disconnected or repeatedly pulling apart.
- Significant air is being drawn from a dusty attic or crawlspace.
- The return grille produces unusually loud rushing or whistling sounds.
- Room doors create noticeable pressure differences during HVAC operation.
- Several rooms have weak airflow despite normal equipment operation.
- A return duct is visibly too small for the connected equipment.
- The system has persistent filter bypass or poorly sealed return connections.
- Water has damaged porous internal duct insulation.
- Existing framing cavities used as returns cannot be sealed or maintained appropriately.
A clogged filter can create excessive airflow resistance without any damaged ductwork. The filter and blower should be evaluated before recommending replacement. A qualified contractor can then determine whether the return pathway itself is responsible.
Why Is Correct Return Air Duct Sizing Important?
A return duct must carry enough air back to the equipment to support the intended supply airflow. If the return passage is too small, resistance increases and the blower may struggle to move the required volume. This can affect heating and cooling performance throughout the home.
The correct duct size depends on the equipment's airflow requirements, duct length, fittings, and available static pressure. The visible dimensions of the return grille are only part of this calculation. A large grille connected to a restrictive duct may still provide inadequate return capacity.
ACCA Manual D provides recognized methods for designing residential supply and return duct systems. The calculations account for duct material and resistance through bends and fittings. A contractor should use appropriate design information rather than select a new return duct only by matching the old diameter.
Return grille sizing also matters. A grille with inadequate open area can create noise and resistance even when the connected duct is correctly sized. The replacement plan should evaluate both components together.
Can a Return Duct Be Too Large?
A return duct can be larger than necessary without producing the same restriction as an undersized passage, but that does not mean unlimited oversizing is desirable. Larger ducts require additional space, material, and suitable transitions. Poorly designed oversized sections can also be difficult to fit into existing construction.
Return ducts should be selected through an appropriate HVAC design rather than rules of thumb. The complete system must remain compatible with the blower and supply network. A larger return duct will not automatically correct a damaged blower or undersized supply trunk.
A contractor should establish the required airflow and determine a suitable duct arrangement. The goal is to provide an appropriately low-resistance return path without unnecessary construction.
What Materials Are Used for Return Air Duct Replacement?
Return ducts can be constructed from rigid sheet metal, suitable insulated flexible ducts, or other approved HVAC materials. The best choice depends on duct size, length, building layout, and local requirements. Some systems use a rigid return trunk with flexible connections to particular grilles.
| Return Duct Material | Common Application | Important Consideration |
|---|---|---|
| Galvanized sheet metal | Main return trunks and larger passages | Requires secure, sealed seams |
| Insulated flexible duct | Selected return branches | Must avoid compression and sagging |
| Fiberglass duct board | Approved return plenums and ducts | Sensitive to moisture damage |
| Approved rigid duct products | Specialized return configurations | Must meet applicable code |
| Mechanical collars and fittings | Connections between sections | Need proper attachment |
| HVAC mastic or listed closure tape | Sealing suitable joints | Must match duct material |
| Approved insulation | Returns outside conditioned space | Must meet local requirements |
Rigid metal often provides a durable return path with predictable dimensions. Flexible ducts can be useful where the design permits gentle routing, but they must be supported properly. An undersized flexible return should not be used simply because it is easier to fit through a narrow opening.
The contractor should also consider whether existing duct board or internal insulation has been affected by moisture. Wet or moldy porous duct material may need replacement rather than cleaning.
How to Replace a Return Air Duct Step by Step?
Replacing a return duct requires an organized installation process that accounts for airflow and building pressure. The procedure below describes how a qualified HVAC contractor approaches a typical replacement. Extensive changes to return pathways should be designed and tested rather than completed by guesswork.
Step 1. Inspect the Existing Return System
Begin by identifying every return grille and tracing the connected ductwork toward the furnace or air handler. Examine accessible joints for openings, crushed sections, and deteriorated material. Record whether the system contains a single central return or several separate pathways.
The inspection should also identify filter locations and any existing building cavities serving as returns. A return arrangement using floor joists or wall spaces may be difficult to seal. These conditions can affect the replacement design.
Check whether visible damage is limited to one section. A sound main return trunk may remain in service even when one branch needs replacement.
Step 2. Evaluate the Existing Airflow Problem
Measure or assess how the system performs before removing the return duct. Weak airflow may involve an overloaded filter or blower issue rather than the duct alone. A qualified technician can examine static pressure and the condition of the supply and return pathways.
Room pressure differences are also useful information. When bedroom doors are closed, inadequate return pathways can cause pressure imbalances. These conditions may affect comfort and the amount of air circulating through different parts of the home.
The contractor should identify the actual restriction or leakage problem before changing the system. A replacement that does not address the cause may leave the original complaint unresolved.
Step 3. Calculate the Required Return Capacity
Determine how much air the heating and cooling equipment must circulate. The replacement design should provide a return path that accommodates the intended airflow without excessive resistance. Duct dimensions and fittings must be selected with the complete system in mind.
ACCA Manual D principles can be used to evaluate duct sizes and pressure loss. The return grille must also provide suitable free area for the connected duct. A large duct attached to a restrictive grille may still produce noise and airflow problems.
If the home contains rooms with inadequate return pathways, the design may require additional returns, transfer grilles, or properly designed jump ducts. These features should be evaluated as part of the system rather than added randomly.
Step 4. Plan the New Duct Route
Identify the most suitable route between the return grille and the return plenum or filter cabinet. The route should avoid unnecessary bends and provide access for installation. Existing framing and nearby electrical or plumbing systems must also be considered.
The Department of Energy's Building America guidance recommends fully ducted, air-sealed returns rather than relying on building cavities alone as return passages. Framing cavities can draw unwanted air through construction gaps and are difficult to maintain as airtight ducts.
Where the existing return uses a framing cavity, the contractor should evaluate how to replace or correct it under applicable local requirements. The new route should provide a reliable connection to the equipment.
Step 5. Confirm Permit and Safety Requirements
Before removal, check whether the project requires permits or local inspections. Major changes to return duct capacity can affect the operation of a forced-air system. A qualified contractor should also consider combustion appliance safety in homes containing gas or oil-burning equipment.
Return system changes may alter pressure differences within the building. Under some conditions, these changes can contribute to backdrafting of naturally vented combustion appliances. Appropriate safety evaluation is important when the work affects building pressure.
Older duct insulation may contain asbestos. Suspected materials should be assessed by qualified personnel before cutting or removal. Ordinary HVAC workers should not disturb unknown hazardous insulation without appropriate procedures.
Step 6. Shut Down the HVAC Equipment
Turn off the affected heating and cooling system before disconnecting the return duct. When work involves opening equipment cabinets or electrical areas, qualified personnel should follow appropriate power isolation procedures. The blower should not operate while return passages are open.
An open return near an operating blower can draw loose dust and debris into the equipment. Removing the duct while the system runs can also interfere with safe service work. Equipment should remain out of normal operation until the duct network has been restored.
The contractor should distinguish the return plenum from electrical or combustion components before opening any access panels.
Step 7. Remove the Damaged Return Duct
Carefully detach the damaged passage from its connections and supports. The removal process should protect sound ducts and fittings intended for reuse. A metal trunk may need to be disconnected from several branches before it can be removed.
Control dust and loose insulation during demolition. If the material contains significant suspected mold or pest contamination, the work may require additional handling procedures. Unknown older insulation should not be disturbed until it has been evaluated appropriately.
After removal, inspect the exposed return grille box and equipment connection. Damaged fittings should be repaired before installing the new duct.
Step 8. Prepare the Return Grille Connection
The return grille or box must connect to the new duct without unnecessary gaps. Inspect its frame and collar for looseness or damage. A return box that leaks around the surrounding wall or ceiling can draw air from the cavity rather than exclusively through the intended opening.
The Department of Energy recommends sealing return boxes where they meet floors, walls, or ceilings using suitable materials. This helps limit unintended air entry. A secure connection also prevents the grille from rattling during operation.
If the existing return grille is too small for the new design, replacement or relocation may be necessary. The grille should be selected for the required airflow rather than appearance alone.
Step 9. Install the New Return Duct
Position the replacement duct along the planned route. Rigid metal sections should be mechanically secured and supported according to their size and configuration. Flexible return ducts need gentle bends and proper support so the inner passage remains open.
Avoid forcing flexible duct through framing openings that compress its diameter. Excess material should not be left in large loops. An appropriate rigid transition may be needed where clearance is restricted.
The duct should connect the return grille to the intended HVAC return point without drawing air from surrounding building cavities. This is one of the main goals of a properly designed return system.
Step 10. Secure and Seal Every Connection
Mechanically fasten the new duct to its collars, plenums, and fittings using approved methods. Suitable HVAC mastic or listed metal-backed closure tape can then seal appropriate joints. Ordinary cloth-backed duct tape should not be used as the permanent sealing method.
A return leak is especially important because negative pressure inside the duct can draw air from attics, crawlspaces, or wall cavities. This unwanted air may carry dust or moisture into the system. The connections must therefore be inspected carefully.
When flexible duct is used, the inner liner must be attached and sealed to the collar before the surrounding insulation and outer jacket are restored. Securing only the exterior covering does not produce a reliable return connection.
Step 11. Restore Insulation and Protective Coverings
Return ducts located outside conditioned space may require insulation under applicable energy codes. The specific rating depends on the installation location and local requirements. Insulation helps reduce heat transfer between the air inside the return duct and its surroundings.
The exterior jacket or vapor protection should remain continuous where required. In humid spaces, poorly insulated cold duct surfaces can experience condensation. The contractor should account for the surrounding moisture conditions.
A return duct located entirely inside conditioned space may have different insulation requirements. The building's thermal boundary and local rules should guide the decision rather than a single universal specification.
Step 12. Check the Filter Arrangement
The replacement return system must maintain a suitable filter location. The filter should fit its designated housing correctly and provide the required filtration without excessive airflow resistance. Gaps around the filter can allow particles to enter the blower and other equipment components.
A contractor should verify that the new duct connection does not bypass the filter. A poorly placed connection can draw unfiltered air directly into the equipment. This problem may remain hidden until dust accumulates on internal components.
If the system uses filter grilles at several returns, the new design should account for those filters and their combined pressure drop. The arrangement should remain compatible with the HVAC equipment.
Step 13. Inspect the Completed Return Path
Examine the entire replacement for open seams, damaged insulation, or unsupported sections. Confirm that all connection collars remain secure and that the duct has not become crushed during installation. Temporary access openings should also be restored.
The contractor should check the return grille and any related transfer pathways. Rooms with closed doors may require adequate return access to prevent pressure imbalance. This condition should be evaluated according to the design rather than assumed from the presence of a single hallway return.
Correct visible problems before the system is restarted. Returning to the installation area later may require additional ceiling or wall access.
Step 14. Test Duct Leakage and System Pressure
A professional leakage test can identify openings in the new return passage. The contractor may also measure static pressure to determine whether the replacement provides an appropriate return path. Excessive resistance can remain when the duct is undersized or contains unsuitable fittings.
The results should be interpreted with the rest of the HVAC system. A return duct cannot be evaluated accurately without considering the filter, blower, and supply network. The installation should support the equipment's required airflow.
In homes with naturally vented fuel-burning appliances, appropriate combustion safety checks may also be needed after changes to duct sealing or building pressure conditions.
Step 15. Verify Airflow With Room Doors Closed
Operate the HVAC system after all connections and panels are restored. Check whether the return grille produces abnormal noise and whether airflow remains suitable. Significant pressure differences may occur when bedroom or office doors are closed.
The Department of Energy's Building America guidance describes pressure balancing between closed rooms and the main body of the home. Dedicated returns, transfer grilles, and jump ducts can provide suitable pathways when correctly designed. Simply enlarging one central return may not correct pressure problems in isolated rooms.
The contractor should address remaining restrictions before the work is accepted. A properly installed return duct should support normal airflow without drawing air from unintended locations.
Can You Replace a Return Air Duct With Flexible Ductwork?
Yes. Suitable insulated flexible ductwork can be used for some return branches when properly sized and installed. However, large main returns may be better served by rigid duct materials, depending on the required airflow and available space.
Flexible returns are sensitive to sagging and compression. The inner liner should remain extended without excessive loops, and wide support straps should prevent deformation. A sharply bent flexible return can create substantial resistance even if the nominal diameter appears adequate.
The connections must be mechanically attached and airtight. The insulation and exterior vapor barrier should be restored around each joint where required. The duct material should be selected according to the system design rather than ease of installation alone.
Can You Replace a Return Air Duct With a Wall or Floor Cavity?
Using an ordinary wall or floor cavity alone as a return pathway is not recommended by current Department of Energy Building America guidance. Such cavities can contain gaps that allow air to enter from unintended locations. Dust or insulation particles may also be drawn into the system.
Some existing buildings contain returns constructed using panned floor joists or other framing cavities. The appropriate correction depends on local codes and the building's construction. Retrofitting a fully ducted pathway can provide a more predictable and maintainable return system.
A contractor should not open a new framing cavity and connect it to the blower without proper design and approval. Airtight construction and building pressure considerations are important. A purpose-built return duct is generally the preferred solution.
How Much Does Return Air Duct Replacement Cost?
Return duct replacement costs depend on the size and type of passage being replaced. General residential duct replacement estimates commonly range from $25 to $55 per linear foot, while an individual straightforward duct run may cost approximately $270 to $500. Larger return trunks and changes to grille locations can require a higher project budget.
A central return may be substantially larger than an ordinary supply branch. Replacing it can involve custom metal fabrication or new transitions at the equipment. Finished wall or ceiling restoration can also increase cost.
A contractor should provide an estimate based on the required airflow and actual route. The price should include suitable connections, sealing, insulation, and performance checks. A material-only quote is not equivalent to a finished replacement.
What Mistakes Should You Avoid When Replacing Return Ductwork?
Return duct mistakes can affect the entire HVAC system rather than only one room. A major return leak may draw unwanted air into the blower, while undersizing can restrict airflow across heating and cooling equipment. These problems should be avoided during design and installation.
Common mistakes include:
- Replacing the return without confirming the required airflow.
- Selecting a duct solely by matching an inadequate old size.
- Connecting the return to an unsealed framing cavity.
- Leaving joints that draw air from attics or crawlspaces.
- Using a grille with insufficient free area.
- Installing flexible duct with sharp bends or compression.
- Failing to secure the inner liner mechanically.
- Using ordinary cloth-backed tape as a permanent seal.
- Bypassing the HVAC filter through an incorrectly placed connection.
- Ignoring pressure differences when interior doors are closed.
- Omitting suitable insulation in unconditioned spaces.
- Failing to evaluate combustion safety where pressure changes are significant.
- Restarting the blower before all openings are sealed.
- Skipping airflow and pressure verification.
A correctly sized return duct must also be installed in a suitable location. The replacement should not create an opening that draws air from a garage or other prohibited location. Applicable mechanical code and equipment instructions govern where return air may be taken from.
When Should You Hire an HVAC Professional?
Professional service is appropriate when replacing a major return trunk or changing the home's return-air design. The work affects total system airflow and may change pressure differences between rooms. A qualified contractor can evaluate equipment requirements and select appropriate duct sizes.
Professional assistance is particularly important when the replacement passes through finished walls or involves existing framing cavities. The contractor should identify building and fire-safety requirements before creating new openings. Unknown insulation materials may also need assessment.
Ask for an installation plan and a written explanation of the expected airflow improvements. The estimate should identify any new return grilles or transfer pathways. Final leakage and airflow testing should be part of the project discussion.
How Can You Keep Return Air Ducts in Good Condition?
Regular filter maintenance helps protect the air handler and return system. The filter should fit its housing without significant bypass gaps. Return grilles should also remain clear of furniture and other obstructions that restrict airflow.
Inspect accessible return duct connections during routine HVAC maintenance. Loose joints should be repaired before they begin drawing air from unfinished spaces. Moisture around insulated return ducts should also be investigated promptly.
Avoid modifying the return system without considering the entire HVAC design. Closing off a return or installing a restrictive grille can affect multiple rooms. Changes should be evaluated for their effect on airflow and building pressure.
Conclusion
Replacing a return air duct requires proper sizing and an airtight pathway from the return grille to the HVAC equipment. Damaged sections should be removed, while sound components may remain in service. The new duct must be mechanically secured and sealed to prevent unwanted air from entering the system. Filter placement and room pressure balancing also need attention. Before replacing a major return duct, have the existing system evaluated and request appropriate airflow and leakage testing.